Sends simple UDP packages over the network (multicast possible).
Inputs
- Host (String)
- Port (Number between 1 and 65535)
- Package (Data)
Sends simple UDP packages over the network (multicast possible).
With this patch you can connect to a TCP server. Specify a host and a domain and connect your data to send to bytes. The received data is available on the output “Bytes”.
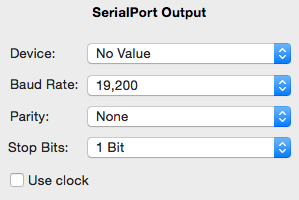
This patch enables you to use any attached serial port as a output device. You can configure the port in the inspector

Device: Choose an available device. Tries to reconnect on lost connection or project startup.
Baud Rate: Select a baud rate for the device.
Parity: None, even or odd parity.
Stop Bits: Select if one or two start bits should be used
Use Clock: Checking this option uses the clock input for sending. You may connect an LFO with 30 FPS (the other values don’t matter at all) to it if you want to have a refresh rate of 30 resends per second. Otherwise it will send data if the input has changed.
While connected, the output Connected is 1, otherwise 0.
Use the Art-Net™ Output patch to send your data (preferably 512 bytes) over the network. The Universe should be a number between 0 and 32768.
Art-Net™ Designed by and Copyright Artistic Licence Holdings Ltd.
The Injected Byte Array patch merges multiple byte arrays into one big byte array. You can change the output size (in bytes) and how many byte arrays are merged. For every byte array there is a corresponding start value, where you specify at which byte this array should be inserted.
The Byte Array patch merges multiple input numbers, the count is configurable in the inspector view, into one byte array (data). Every value should be between 0 and 255.
The Keyboard patch outputs a boolean value for every key from A-Z, 0-9, and Space.
Important: The Keyboard patch only reacts to key events in the live view where it’s own view is placed.
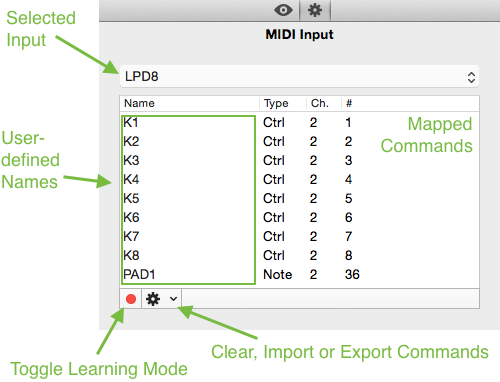
The MIDI Input patch is one of the more complex patches. It has no inputs and all of the settings are done using the inspector. It has one standard output, status, which is 1 if you are connected to the device and 0 if not.

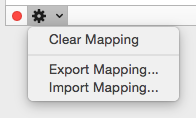
The drop down with the label “LPD8” is for selecting your input, it is possible that there is the same name multiple times, due to some devices having multiple inputs. The table gives you an overview over your commands with the name column being editable and the type,channel and number columns not editable. Using the red dot (Toggle Learning Mode) you can map new commands. Using the gear-button (action button) you can clear, import or export your mapping.

You can export your mapping to a comma-seperated values file and import it in other projects. The file format is quite simple and you can make mappings without Apricum, using a Spreadsheet Application or simple Text Editor. The format:
Type (C for Control, N for Note), Channel, Number (Note/Control#),Name
for example:
C,0,5,Slider #5

C,0,6,Slider #6

N,0,2,Button C